Installing Visual Studio Code
Follow the instructions for your operating system:
Windows
Go to https://code.visualstudio.com/. You should see a blue button labeled Download for Windows, Universal Build.
Click this button to download. Once it is downloaded, run the installer (VSCodeUserSetup-<version>.exe).
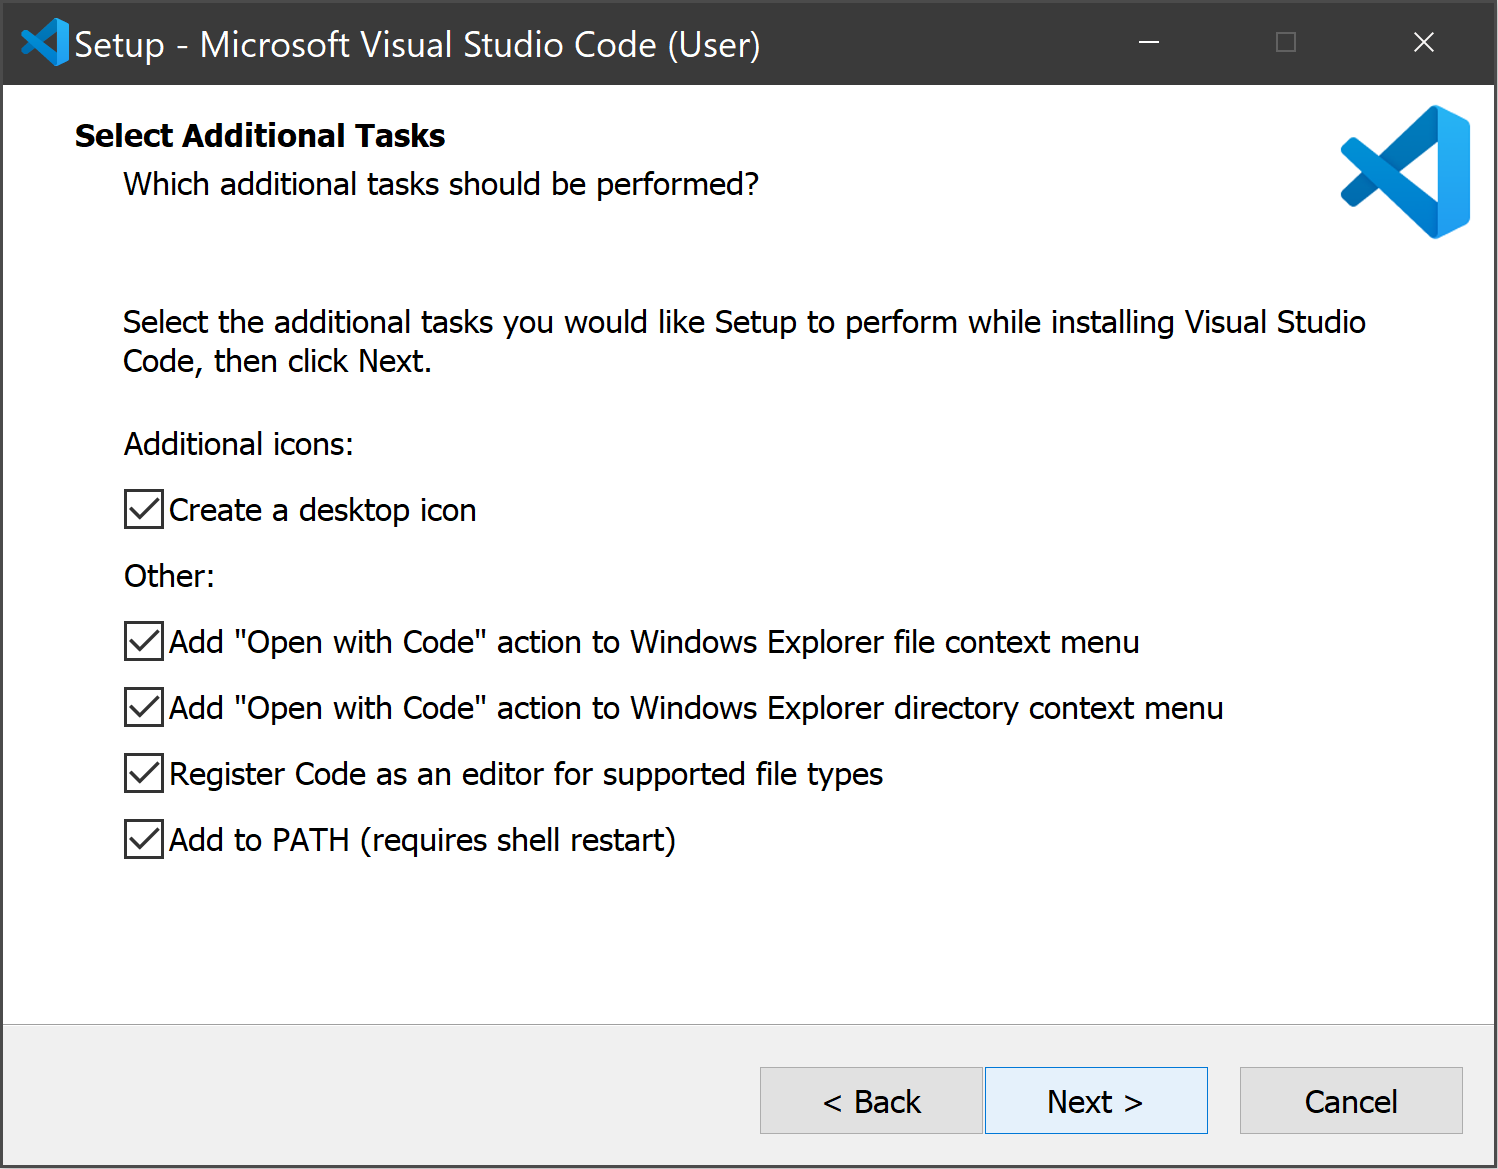
After you accept the license agreement, click Next >. On the page titled Select Additional Tasks, we recommend you check all the boxes (but it is up to you).
Click Next >, then click Install. When the progress bar fills, click Finish.
macOS
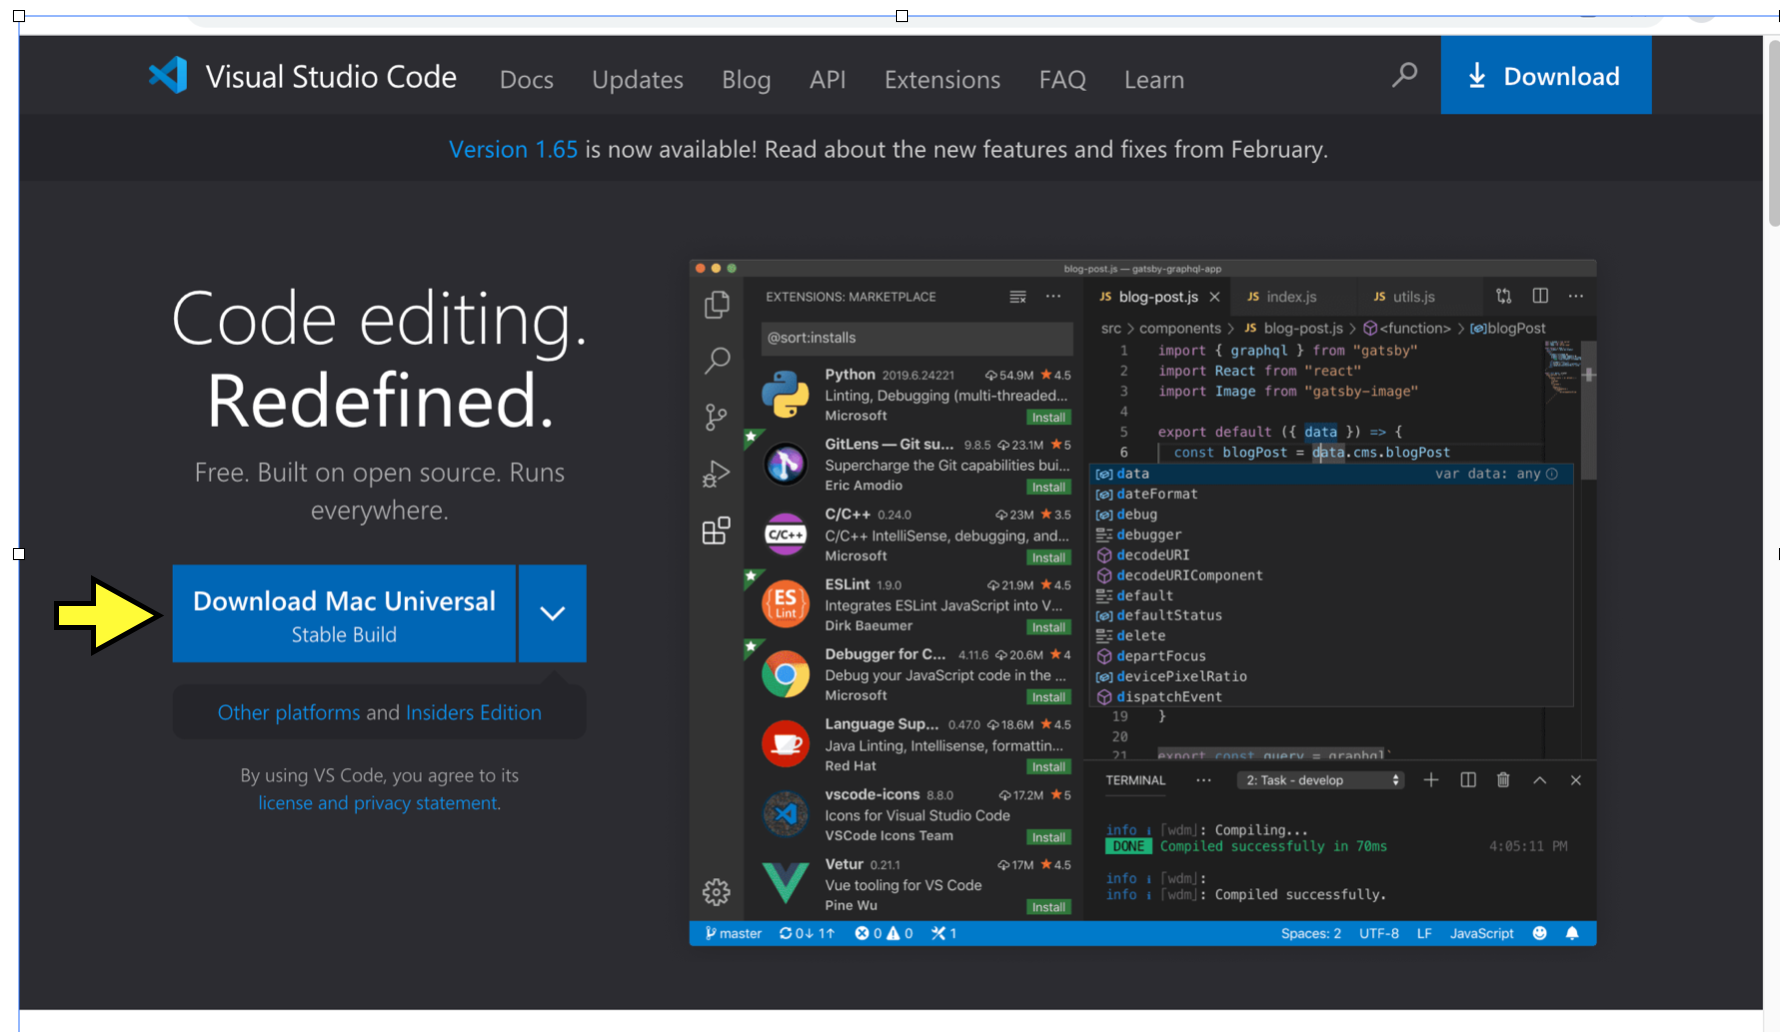
Go to https://code.visualstudio.com/. You should see a blue button labeled Download for Mac Universal, Stable Build.
Click on this button to download. When the download is complete, you will have a new application file called Visual Studio Code. You might instead have zip file, with a name like VSCode-darwin-universal.zip; in this case, open the file to unzip it, and the Visual Studio Code application file should appear. Open a Finder window and navigate to Downloads (it will likely be listed under “Favorites” in the left sidebar). Locate the file named Visual Studio Code, and drag it on top of Applications in the left side bar.
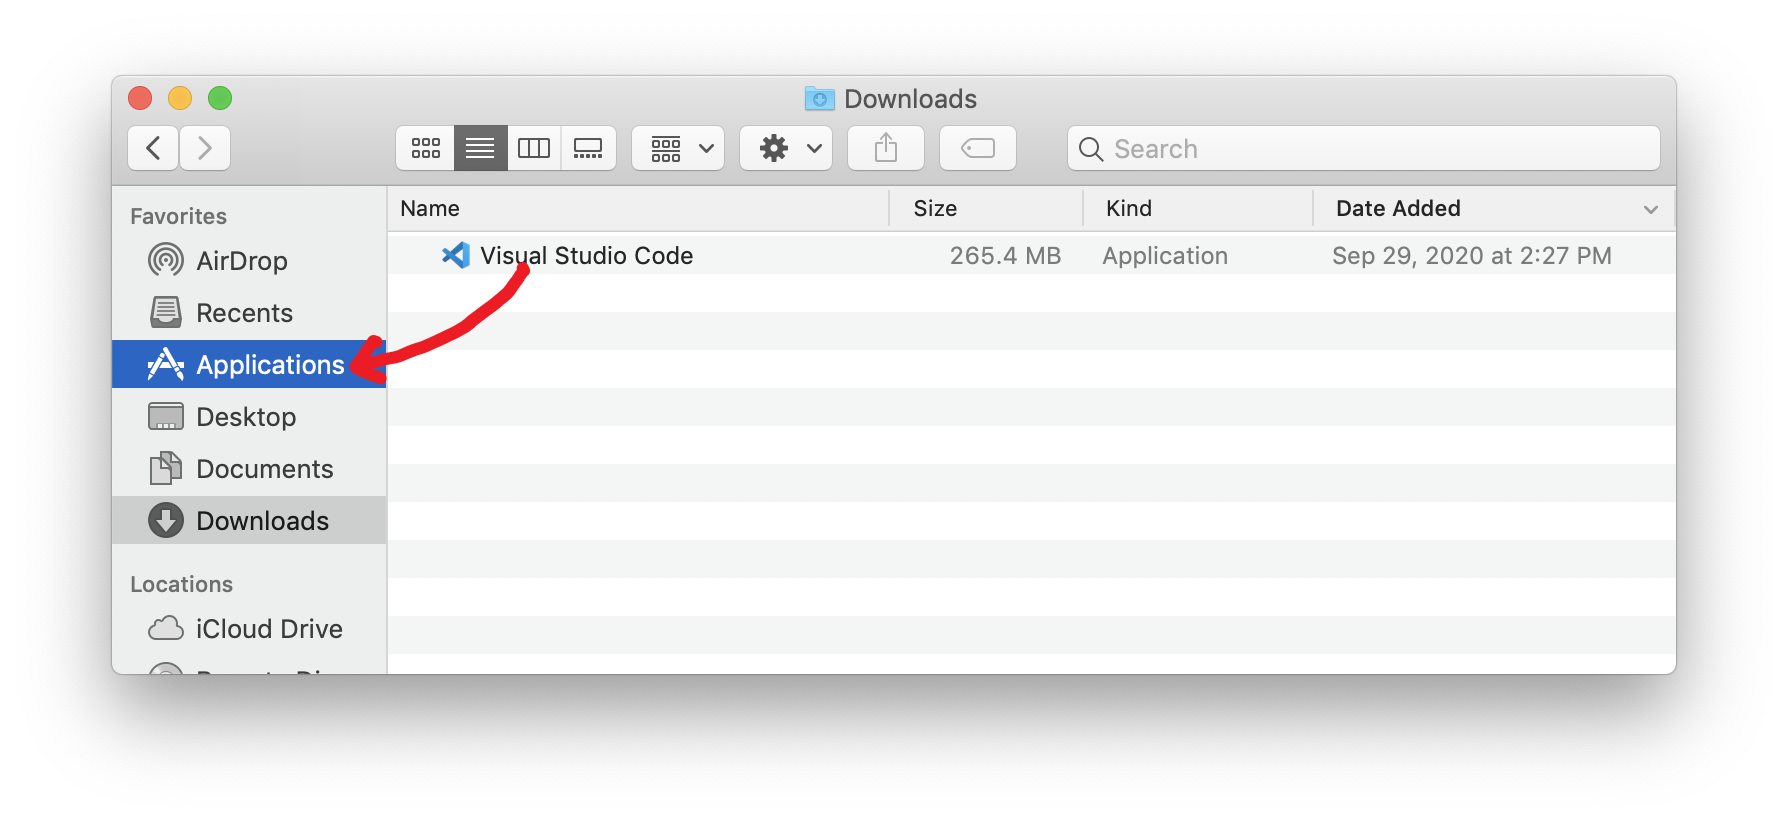
Now, you can find VSCode in your Applications folder, and can open it with a click.
Linux
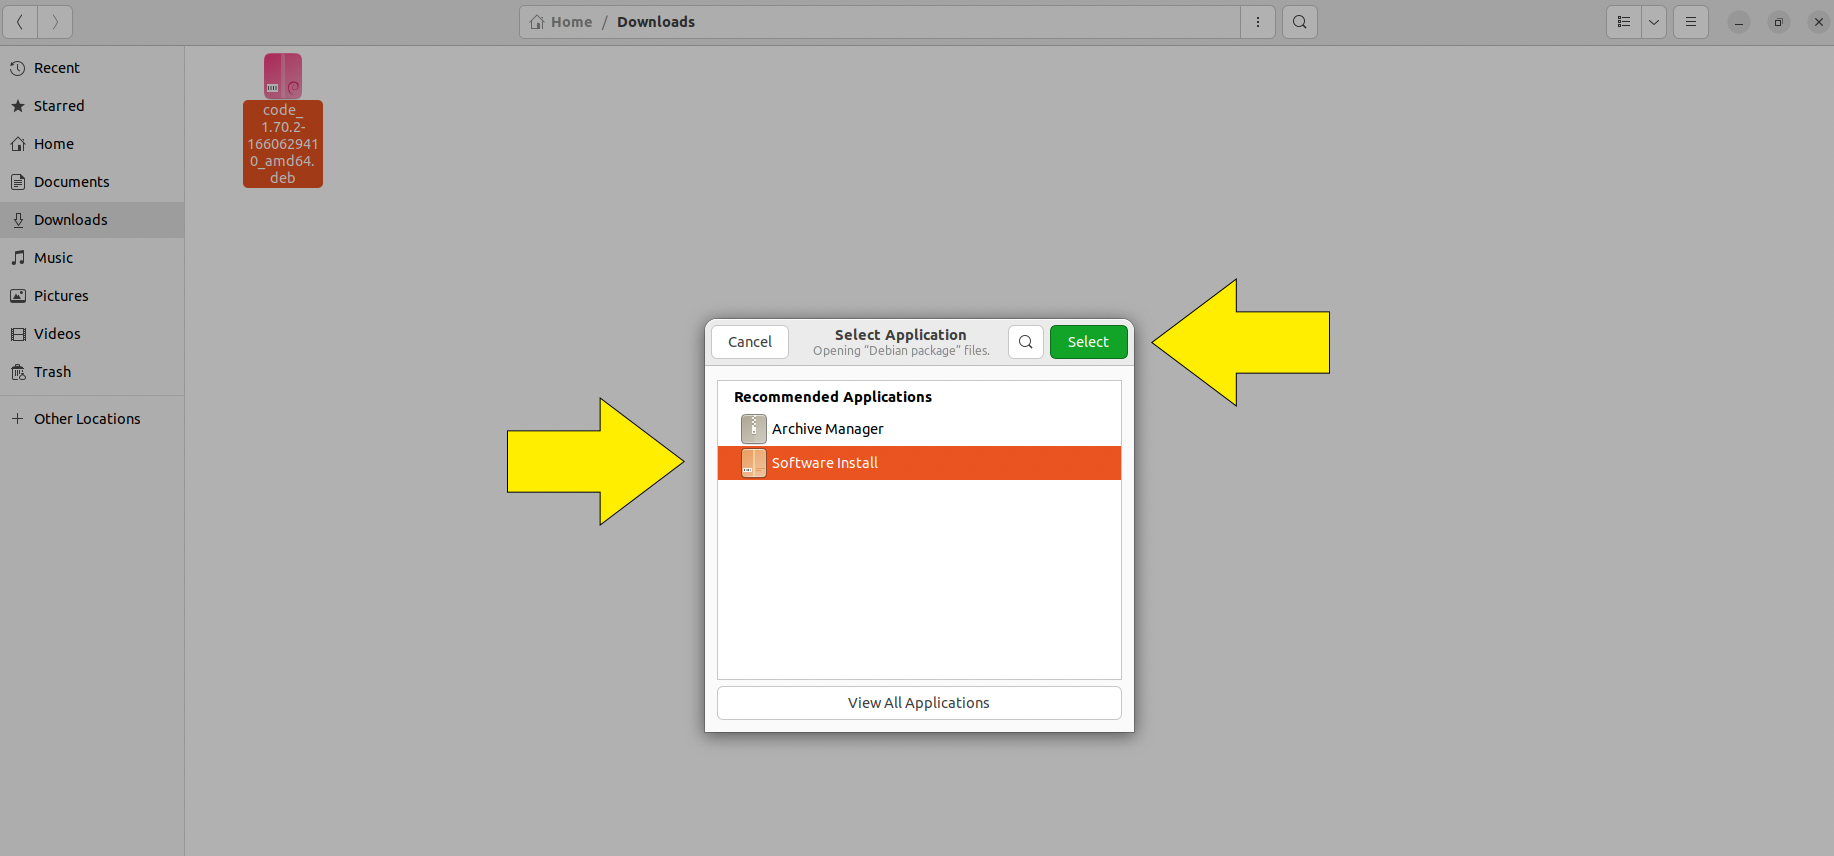
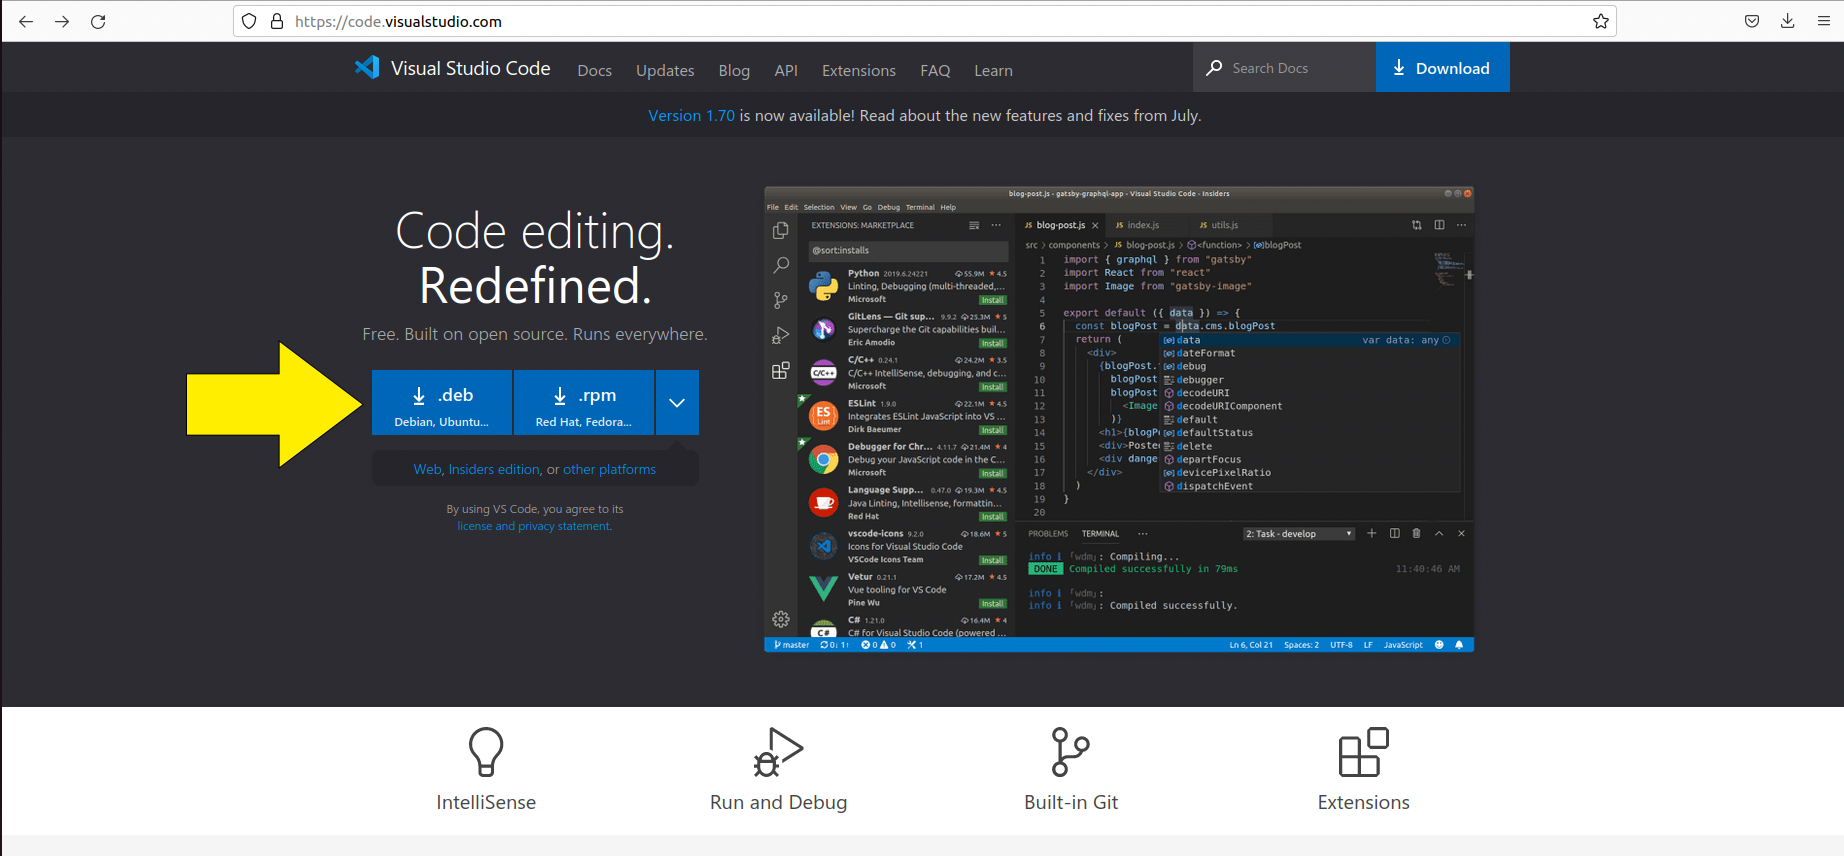
Go to https://code.visualstudio.com/. You should see two blue buttons labeled .deb and .rpm. Since most of you will be using Ubuntu, click on the .deb button.
Open the directory where you downloaded the .deb file and right click on it. Click on open with and select Software Install. Follow the prompts on the installer to install the package.