Git Tutorial - Preparing to use GitHub
Note
This section assumes you have opened you have an open terminal window connected to one of the CS Linux servers.
In this section, you will do the work necessary to use GitHub. Specifically, you will:
Create a GitHub account (if needed),
Create an SSH key using one the CS Linux servers, and
Upload that key to GitHub.
Creating a GitHub Account
If you do not yet have one, you can get a GitHub account here: https://github.com/join. We encourage you to use your CNetID as your GitHub account name, if possible. If that name is already taken, try using your CNetID as a prefix in your Github username.
Setting up SSH Access
The next step is to create an SSH key and upload it to GitHub, which will allow you to access your GitHub repositories from the terminal.
While these steps may seem a bit intricate, you only need to do them once for the CS Linux machines. If at some later date, you want to access your repository from a different computer (e.g. your personal computer), you will have to create a new SSH key and upload it to GitHub.
As in the previous sections, these commands should be run in a terminal window that is connected to one of the CS Linux servers. It is best to do the next few steps in your home directory, so run:
$ cd
to ensure that you are in your home directory rather than in your
git-tutorial directory.
Creating an SSH Key
When you log into the GitHub website, you will use the username and password associated with your GitHub account. When using Git commands from the terminal, however, things are a bit different. In particular, GitHub uses two mechanisms for authenticating yourself from the terminal: Personal Access Tokens and SSH Keys. We will be using SSH keys.
In a nutshell, an SSH key is a file that resides in your home directory, which you can think of as a file that stores a secure password. (SSH keys are a bit more complex than that but, for our purposes, we can just think of them as extra-secure passwords.)
To create an SSH key, run the following command from the terminal:
$ ssh-keygen -t ed25519 -C "CS Linux Server SSH Key"
(As an aside, Ed25519 is a public-key signature system. It is more secure than RSA, which may be more familiar to some of you.)
You will see the following prompt:
Generating public/private ed25519 key pair.
Enter file in which to save the key (/home/ar0r/.ssh/id_ed25519):
Press Enter. This will select the default file path shown in the prompt: /home/CNETID/.ssh/id_ed25519.
Note
If, after pressing Enter, you see the following message:
/home/CNETID/.ssh/id_ed25519 already exists.
Overwrite (y/n)?
This means there is already an Ed25519 SSH key in your home directory. You should proceed as follows:
If you are already familiar with SSH keys, and know for certain that you’d like to use your existing Ed25519 SSH key, type “n” and skip ahead to the Uploading your SSH key to GitHub section below.
If you do not know why you have an Ed25519 SSH key in your directory, it’s possible it was created for you if you’ve taken another CS class in the past. Type “n” and then run the following commands to create a backup of your existing key:
$ mv ~/.ssh/id_ed25519 ~/.ssh/id_ed25519.bak
$ mv ~/.ssh/id_ed25519.pub ~/.ssh/id_ed25519.pub.bak
Then, re-run the
ssh-keygencommand and press Enter when prompted for the file name, and follow the rest of the instructions in this section.
Next, you will see this prompt:
Enter passphrase (empty for no passphrase):
Just press Enter here. You will be asked to confirm (just press Enter again):
Enter same passphrase again:
Note
While it may seem counterintuitive, we don’t want our SSH key to have a passphrase (this is an added layer of security that we don’t need here; your GitHub account will still be secure even if your SSH key doesn’t have a password).
If all goes well, you should see something like this:
Your identification has been saved in /home/ar0r/.ssh/id_ed25519
Your public key has been saved in /home/ar0r/.ssh/id_ed25519.pub
The key fingerprint is:
SHA256:CvLPtFFx70iR3Fas2o0pmbnWwQ8gJSVke8FmWzzPmhU CS Linux Server SSH Key
The key's randomart image is:
+--[ED25519 256]--+
|       .+oo. ..  |
|       ..+=++.E  |
|        o=*oo= . |
|        .+o+. +  |
|  . .   S..O.B   |
|   o . o .*oX .  |
|    . +   .+.+   |
|     + o  o . .  |
|      +  .       |
+----[SHA256]-----+
This means your key was created correctly.
Uploading Your SSH Key to GitHub
Now, you need to instruct GitHub to accept your SSH key. To do this, log into https://github.com/ and go to your Settings page by clicking on the top-right account icon, and then selecting “Settings” in the drop-down menu. Then, click on “SSH and GPG keys”.
Now, click on the green “New SSH key” button. This will take you to a page where you can upload your SSH key:
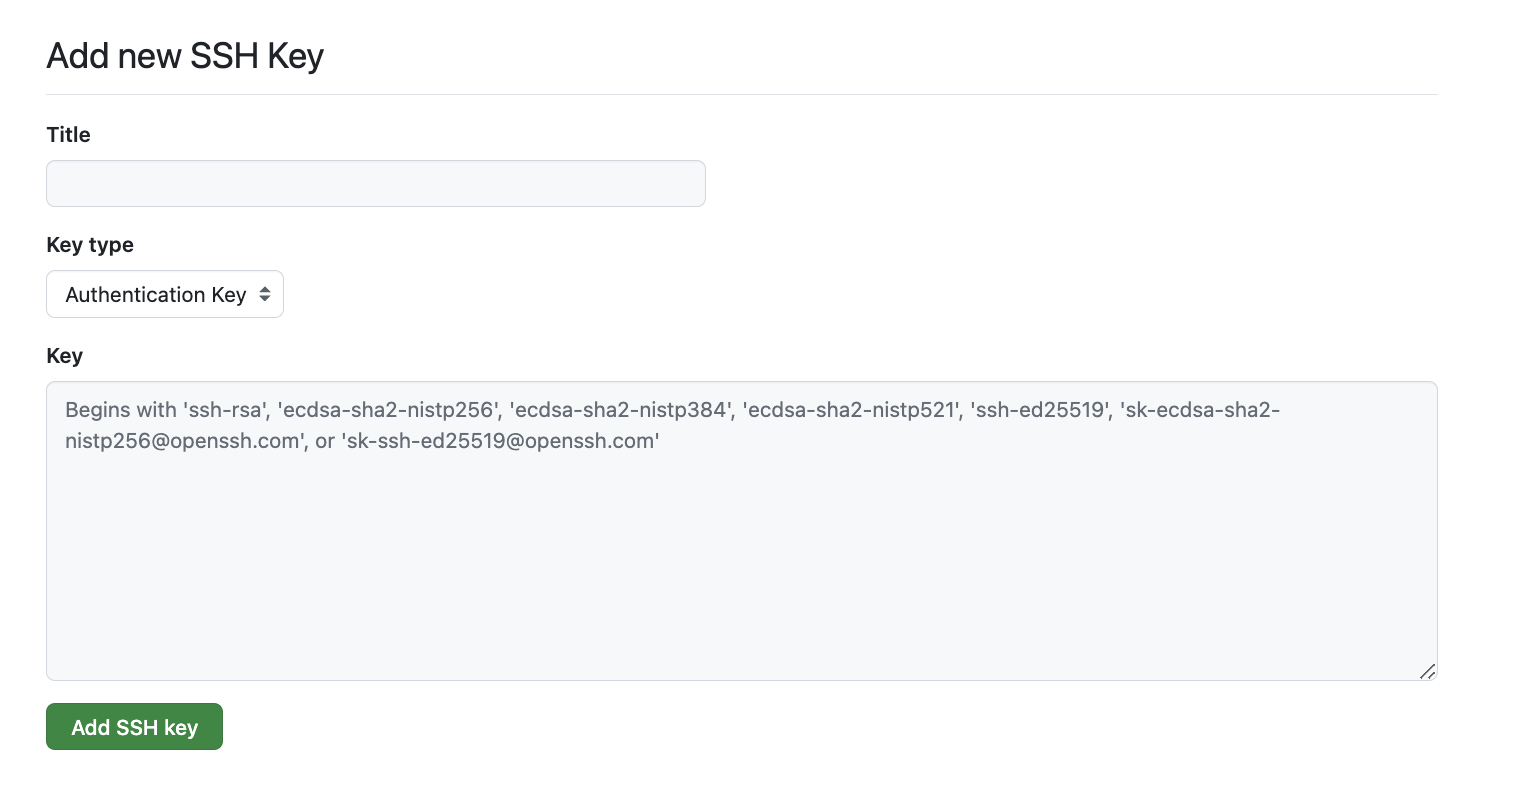
You will be asked for three values: a title, a key type, and the key
itself. The title can be anything you want, but we suggest something
like “CS Linux Server SSH Key”. Choose Authentication Key from
the drop down menu for the key type.
The value of the key is contained in the .ssh/id_ed25519.pub file in your home directory. To print
out the contents of that file, we can just use the cat command:
$ cat ~/.ssh/id_ed25519.pub
This will print a few lines of output starting with ssh-ed25519 and
ending with CS Linux Server SSH Key. Copy the whole output
to the clipboard; you can do this by clicking and dragging the mouse
from the first character to the last character, and then pressing
Ctrl-Shift-C (Cmd-C for MacOS users).
Then, paste the key into the “Key” field on the GitHub page. Then click on the green “Add SSH Key” button.
To verify that you correctly uploaded the key, try running the following command:
$ ssh -T git@github.com
You may see a message like this:
The authenticity of host 'github.com (140.82.114.4)' can't be established.
ECDSA key fingerprint is SHA256:p2QAMXNIC1TJYWeIOttrVc98/R1BUFWu3/LiyKgUfQM.
Are you sure you want to continue connecting (yes/no/[fingerprint])?
You can safely enter “yes” here. You should then see a message like this:
Hi username! You've successfully authenticated, but GitHub does
not provide shell access.
This means your SSH key is properly set up. Don’t worry about the “does not provide shell access,” that is normal.
If you are unable to set up your SSH key, please make sure to ask for help. You will not be able to complete the rest of the tutorial until you’ve set up your SSH key.
Summary
In this section, you set up your GitHub account for use from the CS
Linux servers. In the next section, you will create a repository on
Git and link it to the local repository (git-tutorial) that you
created in the previous section.